

Foam rolling works better when you do it with a method.
What matters is the area, the pressure and the time.
Red & infrared light
Recover faster, at home
★★★★★ 4,8/5 · rated by verified customers
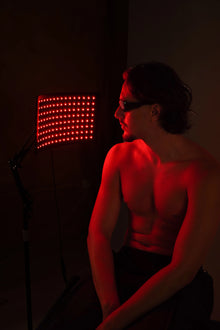
The KumoLux panel supports muscle recovery with full-body red and infrared light.
- 660 nm red + 850 nm infrared light
- Full-body muscle recovery
- Clinically validated biohacking protocols
€399,00€499,00
−10% on your 1st order when you subscribe to the newsletter

The foam roller, or self-administered myofascial release, can help reduce the feeling of tightness and acutely improve range of motion. However, a 2022 review in Sports Medicine notes that the chronic effect on mobility is limited and inconsistent, and that it is not clear the roller releases the fascia in any literal sense.
In other words, look for tolerable pressure, a slow glide and calm breathing, not maximum pain. (health.clevelandclinic.org)
Personalized protocol · included with your purchase
Want us to tell you how to use it in your case?
With your purchase, our experts set up your red and infrared light sessions for your sport and goal.
Message us on WhatsAppOur experts reply · no obligation
What foam rolling can actually deliver
Cleveland Clinic explains that a foam roller can be used before training to prepare the muscles and afterward to ease the feeling of stiffness. Harvard Health adds that it is usually applied to the calves, thighs, glutes, upper back and lats, and that consistency matters more than one heroic session.
A 2023 meta-analysis on PubMed found no clear advantage over no intervention for indirect markers of muscle damage in healthy people. That does not invalidate its use, but it does suggest treating it as a mobility and comfort tool rather than a promise of miraculous recovery.
Technique by area: how to use it without losing effectiveness
Before going through them one by one, remember two simple rules: start gently and do not roll over bones or joints. Mayo Clinic Health System recommends holding each position for 30 seconds or more when you find a tight spot, and Cleveland Clinic suggests working with your breathing and adjusting the pressure as soon as tenderness appears. (mayoclinichealthsystem.org)
on your first order when you join the newsletter
We send you the code instantly. No spam.
Practical summary by area
| Area | Position | Starting time | Technique key |
|---|---|---|---|
| Calves and soleus | Seated, with one leg resting on the roller or using wall support to take weight off. | 30 to 60 seconds per side. | Go slowly, breathe and avoid the Achilles tendon and the back of the knee. |
| Hamstrings | Rest one leg at a time to control the pressure better. | 30 to 60 seconds per side. | Do not roll behind the knee and avoid rocking back and forth. |
| Quads and outer thigh | Face down, or with wall support if you need less load. | 30 to 60 seconds per side. | If the pressure makes you tense up, lower the intensity and do not chase maximum pain. |
| Glutes and hips | Find a position that lets you bear weight without losing control of your pelvis. | 30 to 60 seconds per side. | Slow breathing helps the area relax and keeps your lower back and neck from compensating. |
| Upper back and lats | Work the upper section, ideally with stable support or against the wall. | 30 to 60 seconds per area. | Do not roll over the lower back or over the bony shoulder blades. |
Calves and soleus
In this area, the goal is to decompress without punishing the tendon. Move very slowly, pause a few seconds on the tender spot and then move on. If you feel the ankle or knee taking too much pressure, change your position or use wall support to reduce the load. Mayo Clinic insists on not rolling over joints or bones, and Cleveland Clinic recommends starting at low intensity.
Hamstrings
Hamstrings respond better to a short, controlled movement than to a fast pass from top to bottom. Work one leg at a time, keep your pelvis stable and stay away from the back of the knee. If the discomfort concentrates near the popliteal crease, leave that area alone and work higher up, where there is real soft tissue.
Quads and outer thigh
On the quads, pressure is usually well tolerated as long as the roller does not turn into a hammer. The outer thigh calls for even more caution, because direct pressure there can be intense. If you catch yourself clenching your teeth or holding your breath, back off a little and bear less weight. The idea is to modulate the tension, not to force it.
Glutes and hips
The glutes are often one of the most rewarding areas, because they offer more contact surface and allow fine adjustments in posture. Work with your breathing, rotate the pelvis a few degrees if you need a more comfortable spot, and avoid turning the session into a fight. Cleveland Clinic suggests adjusting the pressure when a tender spot shows up, rather than pushing harder.
Upper back and lats
The upper back can benefit a lot from the roller, especially if you spend many hours seated or in a static posture. Use moderate pressure and focus on the thoracic area, not the lower back. Harvard Health advises avoiding bony areas such as the shoulder blades, pelvis and knees, and Cleveland Clinic recommends changing your approach if a joint hyperextends or hurts.
How to fit it into other recovery routines
The roller fits better as a complement to a warm-up, a mobility routine or a cool-down than as your only strategy. If you want more complete work, you can look at the percussion massage guide by muscle group, combine it with a quick 10-minute mobility routine or go deeper into how to recover better between strength sessions.
Mistakes that reduce the results
- Do not go fast; rolling at full speed reduces your control over the pressure. (nasm.org)
- Do not start with your full body weight; build the load up little by little.
- Do not stay stuck for whole minutes on a painful spot; adjust, breathe and move on.
- Do not roll over joints, bones or the lower back.
- Do not use it on a recent injury, fracture, tear or local inflammation without an assessment.
- Do not confuse intense pain with a better result.
These mistakes often turn a useful tool into an overly aggressive experience. Cleveland Clinic recommends starting light, finding your own tolerance and stopping if the area stays more irritable the next day; Harvard and Mayo advise avoiding bones and joints; and the 2021 Delphi consensus adds caution with open wounds, bruises, recent injury, deep vein thrombosis, circulatory disorders and the use of blood thinners.
How much time to spend and how often
Recent literature still lacks a clear consensus on duration, frequency or roller type. The working numbers therefore serve as practical guidance, not a fixed rule. Harvard Health suggests starting with 30 to 60 seconds per muscle group and repeating 3 to 5 times, at least a couple of times a week; Cleveland Clinic suggests 1 to 2 minutes per area if you feel stiff, with short sessions of up to 10 minutes. Mayo adds that when you find a tender spot, you can hold the position for 30 seconds or more. (pmc.ncbi.nlm.nih.gov)
If the area feels more loaded the next day, reduce the time or the pressure in your next session. If instead mobility improves and the tissue feels friendlier, keep the same dose for a few days and adjust afterward.
When it is better not to use it
Do not use it on fractures, muscle tears, open wounds, recent bruises, acute inflammation or pain that is getting worse. Cleveland Clinic asks you to talk to a doctor if there is a broken bone or a torn muscle, and the 2021 expert review adds caution with pregnancy, blood thinners, clotting disorders, uncontrolled high blood pressure and circulatory problems. If tingling, numbness, weakness or swelling appear, do not push through.
In those cases, the priority is not to roll better but to get a professional assessment, so you know what is going on and what actually suits you.
FAQ
How do you use a foam roller area by area to avoid common mistakes and get better results?
Start with large, soft areas such as the calves, quads, glutes, hamstrings and upper back. Move slowly, breathe and pause a few seconds on the tender spot, without chasing maximum pain. A useful rule is to reduce the load using the wall or partial body support if the pressure makes you tense up. Cleveland Clinic recommends adjusting the intensity to your tolerance level, and the Mayo practical handout reminds you not to roll across joints or bones.
What are the common foam rolling mistakes by body area and how do you correct them?
The most common mistakes are going too fast, loading too much weight from the start and rolling over bony or joint areas. On the legs, the typical error is passing behind the knee or pushing near the Achilles tendon. On the back, the error is using the lower back as if it were a massage table. Correct it by lowering the pressure, taking short pauses and working only on soft tissue. Harvard and NASM insist on avoiding bones, joints and acute injuries.
Foam rolling: which areas are worth working and how long per area to optimize recovery?
The most common areas are the calves, hamstrings, quads, glutes, upper back and lats. As a starting point, Harvard Health suggests 30 to 60 seconds per muscle group with 3 to 5 repetitions, and Cleveland Clinic mentions 1 to 2 minutes per area if it feels stiff. Mayo suggests holding the position for at least 30 seconds when a tight spot appears. The idea is for the session to be short, controlled and repeatable, not a battle of force.
Does foam rolling work on the fascia, and which areas should you avoid anatomically?
The evidence does not confirm that the roller literally "breaks up" or releases the fascia. What does seem to happen is a temporary improvement in range of motion and in stretch tolerance. That is why the practice makes more sense as a mobility and relief-perception tool than as a structural treatment. Anatomically, it is better to avoid bones, joints, the lower back, open wounds and recent injuries. That caution is backed by the 2022 Sports Medicine review and by the safety consensus statements published afterward.
How do you adjust roller pressure on the quads, hamstrings and IT band without pain?
Start with less load than you imagine, for example using wall support or a single leg, and increase only if you keep breathing normally. On the quads and hamstrings, look for firm but manageable pressure. On the outer thigh, lower the intensity further if the tenderness is too strong. Cleveland Clinic advises starting gently and returning to a tender area only after lowering the pressure; NASM adds that maximum pain does not equal more effectiveness.
What now?
If you have acute pain, inflammation, tingling or a recent injury, stop using the roller and check with a health professional before going back to it. If you simply want to keep learning with practical content, you can start with the Kumo Balance home page and continue with a broader recovery routine.

Red & infrared light
KumoLux Panel – Red and Infrared LED Panel
★★★★★ 4,8/5 · rated by verified customers
- 660 nm red + 850 nm infrared light
- Full-body muscle recovery
- Clinically validated biohacking protocols
€399,00€499,00· pay in installments with seQura or Klarna